FAQ – frequently asked questions
Please visit the Measuring Instructions page. It contains all the info needed, including a video on the topic. HERE:
Please visit the Installation Instructions page. It contains all the info needed, including a video on the topic. HERE:
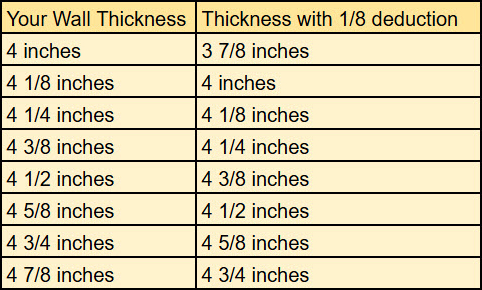
It’s very easy! See the example below. We only work in 1/8th increments. If your walls are not exactly in that increment, just round down to the nearest. Also for other sizes, just use the chart below and replace 4 with your wall thickness. ie: 5 3/8, 6 3/8, 7 3/8, etc.
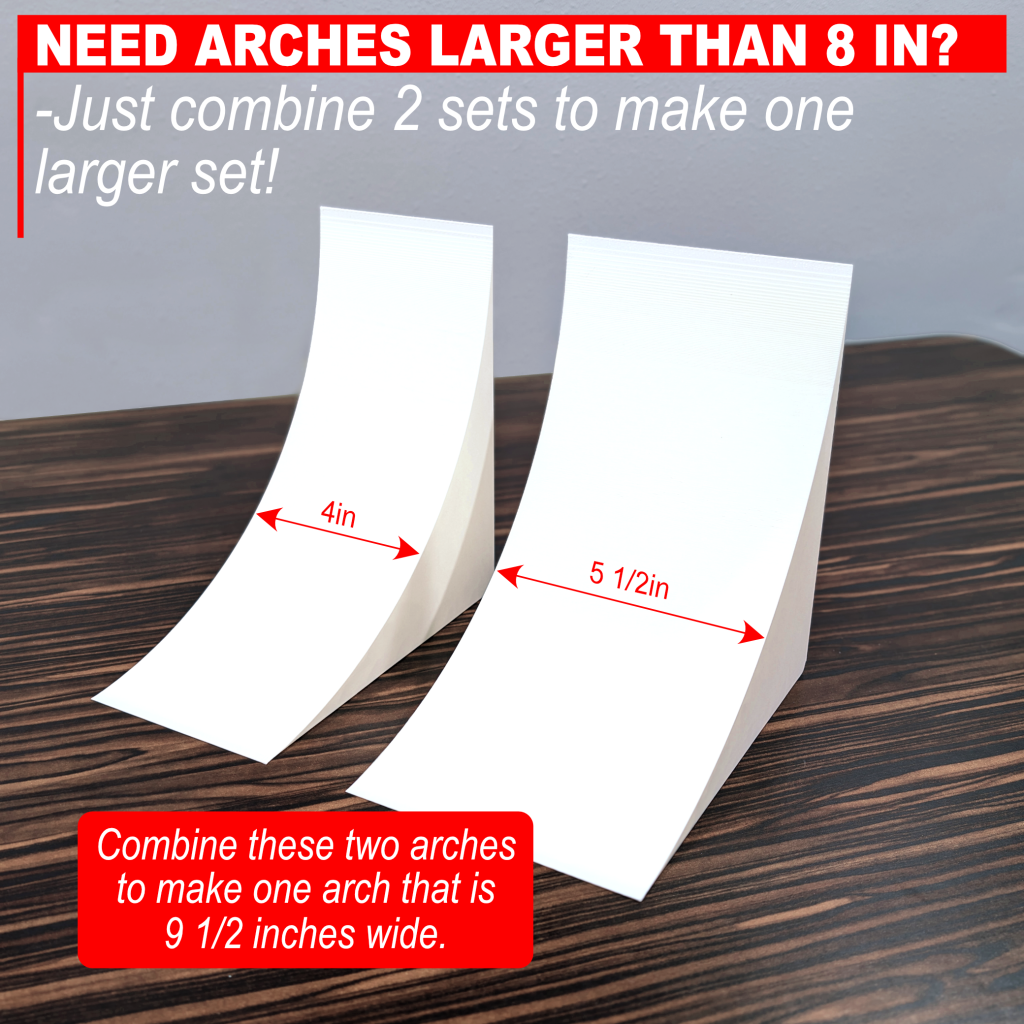
You will need to purchase two separate sets and combine them. For instance, if you need a 10 inch arch set, then you will have to purchase two 5 inch sets and super glue them together. This is a pretty easy process, however take caution, because once the arches touch with the glue applied, they will stick together extremely quickly.
Just lay the arches on a flat surface with a backstop (wall). Have something covering the surface, so that if any glue seeps out, it does not ruin your surface. Apply some super glue to one side of the arch that you are combining, then push the arches on the flat surface, and back to the backstop (wall). This will make sure they are aligned properly before you press them together. Once you press them together, they will stick pretty quick and nothing else is needed. Let them dry for a while to be sure the glue has cured before installing.
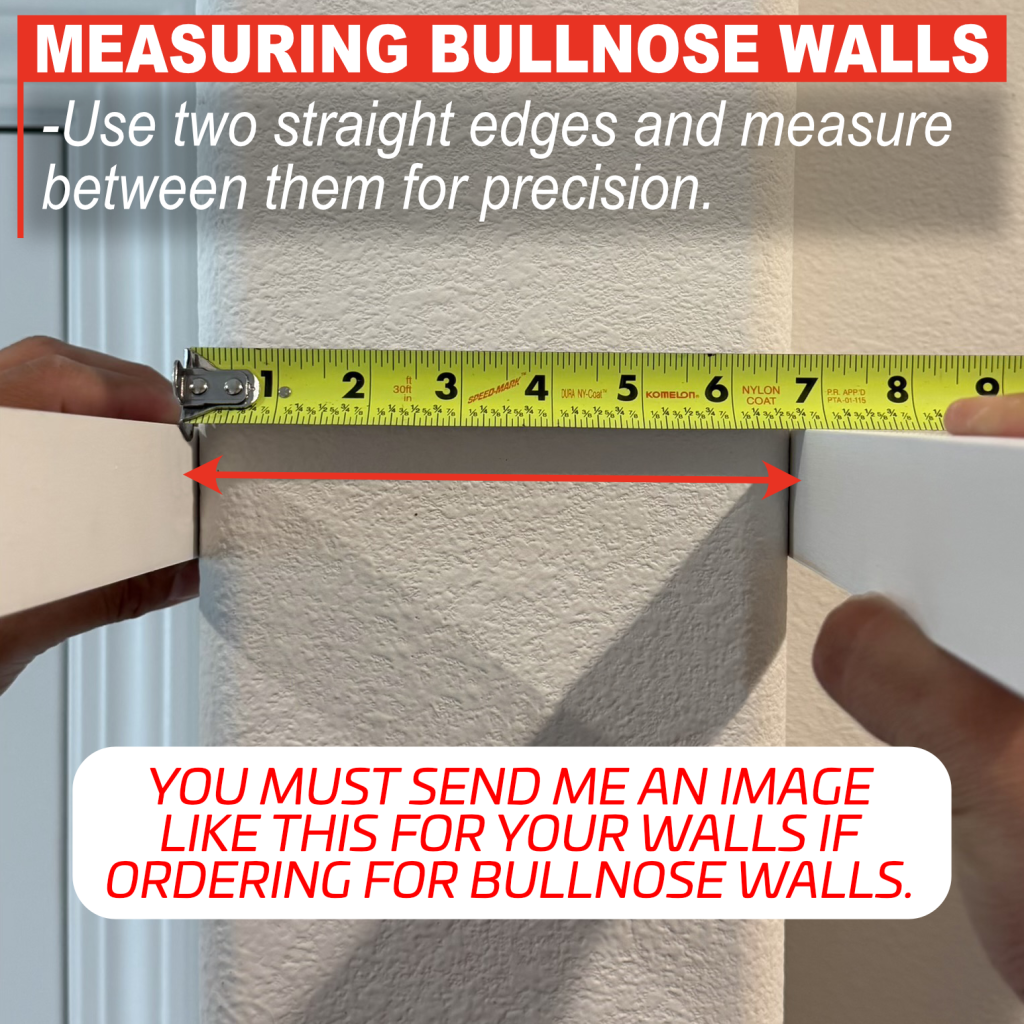
I can absolutely make arches for bullnose walls. The main issue with these walls is getting an accurate measurement. Since the edges are rounded, it’s very hard to get a good measurement.
I will require an image with a ruler or measuring tape up against the area in question. That will help me understand the radius of your bullnose better, since many people measure radius differently.
Also, please make sure the measurement for the wall thickness was done like in my image (see below). Please take your measurement using two straight edges (like in my image) to reference against the walls on both sides and measuring between those two straight edges instead of just trying to measure the wall. You will need two people to pull this off, so please ask a friend to help you.
Once you have your measurement, it would be a good idea to send an image by the contact form, or direct email to: arch.friends.diy@gmail.com
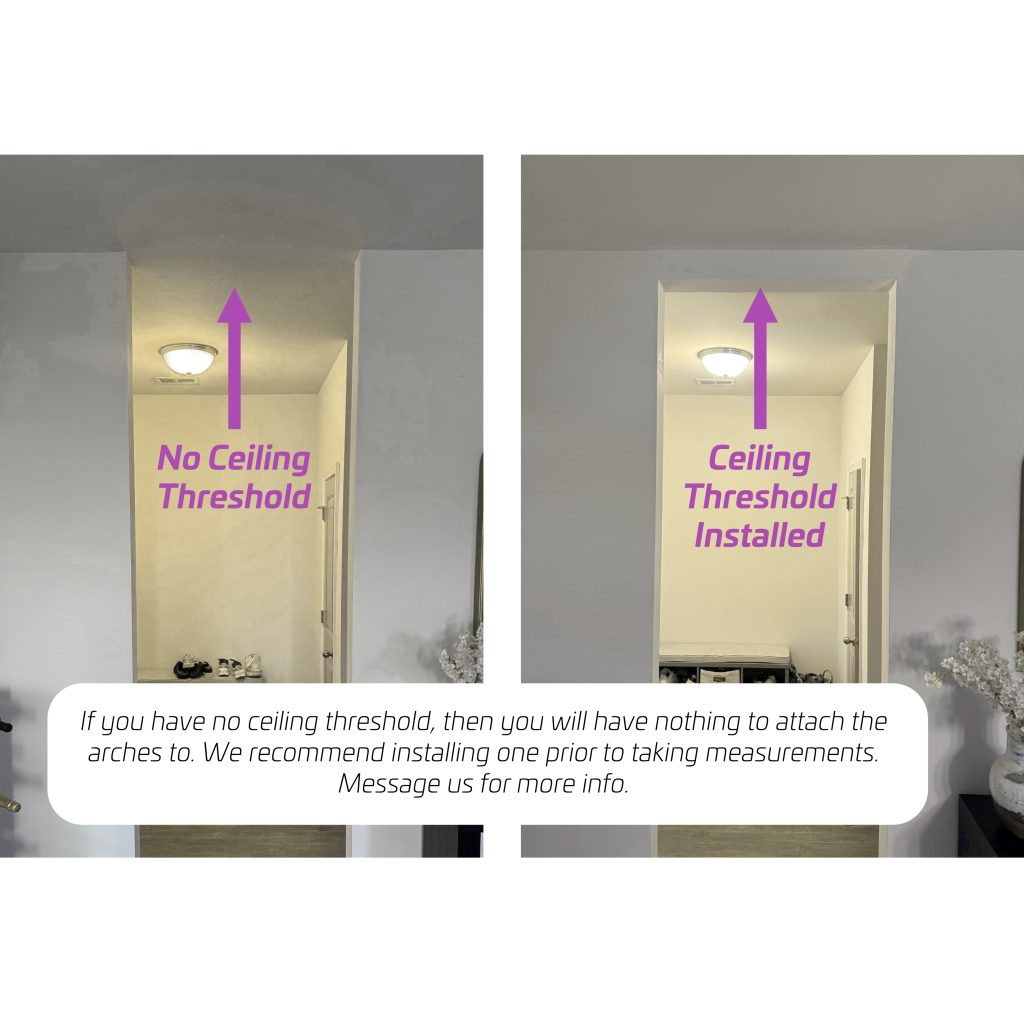
I would highly recommend installing a small threshold on the ceiling. It’s a small wall coming down from the ceiling about 4 inches. It will serve two purposes
- It clearly defines the boundary visually and also forms the “Wall Thickness” to which you buy the arches to match.
- It gives you an easy connection point when installing the arches. Because without a small ceiling wall/divider, there is nothing to tape the arches to when gluing them to the areas. With that wall up top, you can adhere the arches and use painters tape to hold them in place as the glue dries.
It’s pretty easy to make. Basically you would just stack 2-3 2×4’s together and have them go between the walls to form the ceiling threshold. Attaching them would be done with screws through the ceiling drywall, while trying to hit a stud. If there is no stud, you can also (if you have access to the attic above this area), install a false stud to be used as a hold between the ceiling drywall. You may want to also use construction adhesive to the stack of 2×4’s as well.
When you install this, leave room for drywall to cover up the entire stack on both sides and the bottom (side facing the floor). That means you want to place it so it is offset to the outer wall, so that when you add the drywall, it meets the outer wall flush. Then you can mud and tape that divider and then move to the installation of the arch pieces. Best to wait to submit the order for the arches until after you added the drywall to the divider. That way you can be sure to order the correct thickness to meet the same thickness of the divider.